Friday, June 28, 2013

Android Firewall, How to uSE

Hi every one,

So, a lot a friend asked me to help them for Firewall Android. i thought it was a good idea to make a post on it so every one can be satisfied ^^
( the pics are in french ... but the placement of the items are the same just the language that change)

What's Android Firewall:


RROOT ACCES REQUIRED !
Android Firewall is a strong DroidWall ipstables using the firewall Overkill linus. Android firewall allows you to prevent the connection of your app's on internet.
This is the perfect solution for you do not have an unlimited internet package on your device, or if you just want your battery power stay longer.
It is really simple to use and works very good !

Let's start !

So first of all download Android Firewall at this LINK <-- and="" click="" copy="" here="" or="" p="" paste="">( https://play.google.com/store/apps/d...51bGwsMSwyLDNd )

2- when you will open your app Super User will ask you if you whant to allow or denie this app :


Allow the app (if not it wont work ! )

3- select the mode, if you want Black list or White list.
Black list: denied selected apps
White list: enable selected apps


4- Select the app you want to block or allow (depends the mode you have selected) and chose WIFI or Network. (what i do is the app that i want to synchronies while i'm at home with my wifi i blog only the network and it work fine)
Little trick if you want to tick all the app you have a little icone at the right after network ans VPN that says 'unselect all" or "reverse"

5- Open the menu and select the firewall rules. if it is already active, select just apply the rules.


6- you can edit profile (it's really cool if you often go out of you country area) really simple
Just up of the Option mode select profile edit (don't really now it i translated well there a picture)


When done you can select the profile by the maine windows :


7- When you are done APPLY THE RULES


The rules will be saved and automatically restored when you restart your phone.
if you want to check the active rules, select -> see the rules in the options menu.
Wednesday, June 26, 2013

Best Buy: Micromax Canvas 2 now for Rs 8,417

Micromax Canvas 2 Android smartphone with exciting features and an even exciting price as well.
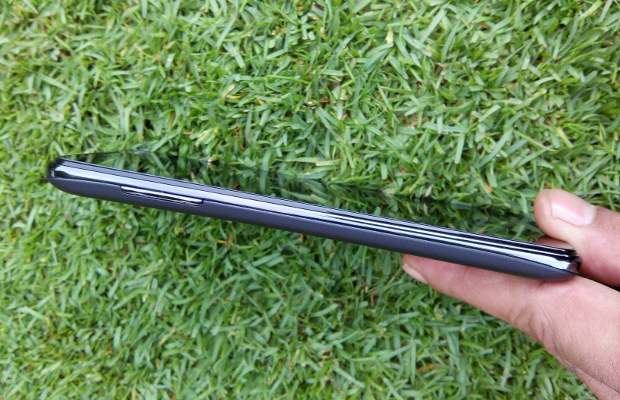
The Micromax Canvas 2 Android smartphone, which not so long ago was selling for Rs 10,000, is now available for just Rs 8,417 only.
The Canvas 2 has been a popular smartphone in the Indian market whose price zoomed to Rs 13,000 from its launch price of Rs 9,999. But now you can get this handset for Rs 8,417 from Flipkart.
Micromax Canvas 2 now for Rs 8,417
The price of the Micromax Canvas 2 is mentioned as Rs 9149 on the website but users will get an automatic reduction in the price while making the payment. Interested users will have to hurry as this is a time limited offer, valid only for today or until the stocks last.
To refresh your memory, Canvas A110 has a 5 inch screen with 800x480 pixels resolution. The screen is an 'IPS panel' that offers better viewing angle. It comes with an 8 megapixel rear cameras that with dual LED flash. The Canvas A110 has a dual core 1 GHz processor, 512 MB RAM and 4 GB of internal storage as well.
Besides, the Canvas 2 also comes with a 2000 mAh battery, 3GGPSWiFiBluetooth, Android 4.0.4, gravity and proximity sensor, and 32 GB expandable memory along with dual SIMconnectivity. Micromax has also released Android Jelly Bean upgrade for the device and users can upgrade the device to it following the purchase.


Tags: Tags: MICROMAX CANVAS 2 PRICE INDIA, MICROMAX CANVAS 2 BEST BUY, MICROMAX CANVAS 2 BEST PRICE, BEST OFFER MICROMAX CANVAS 2

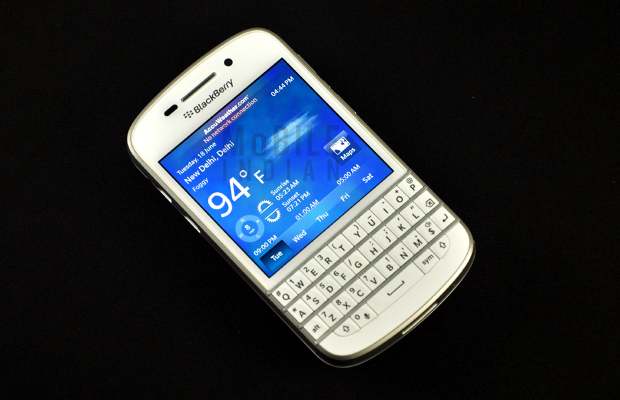
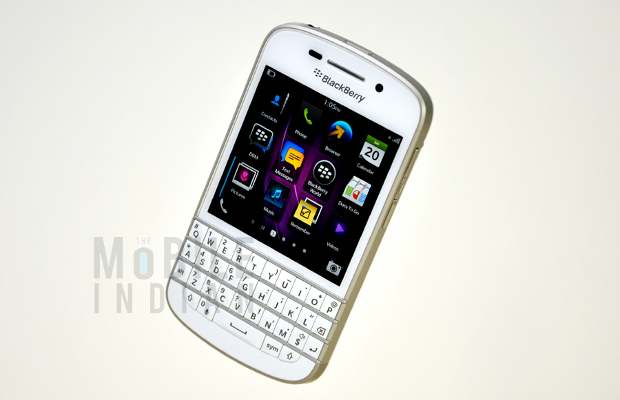
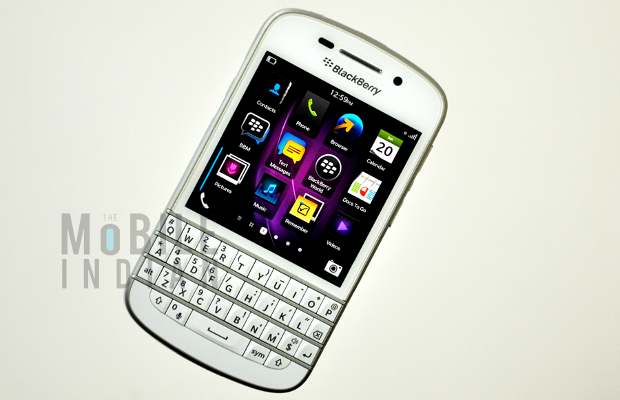
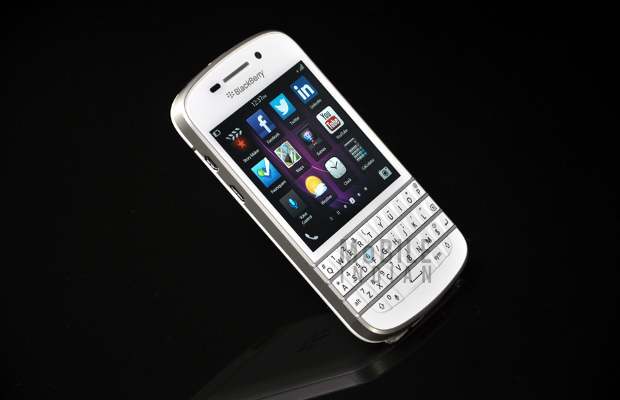
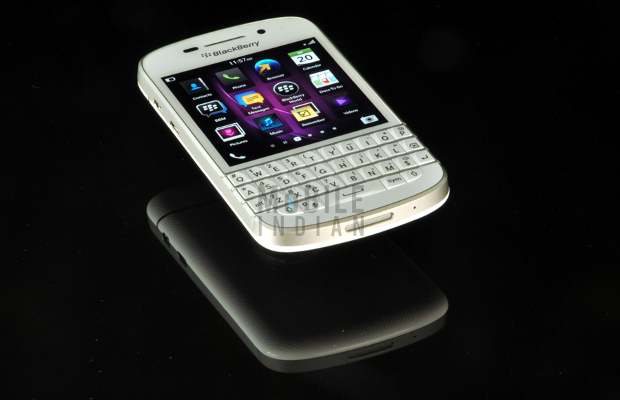
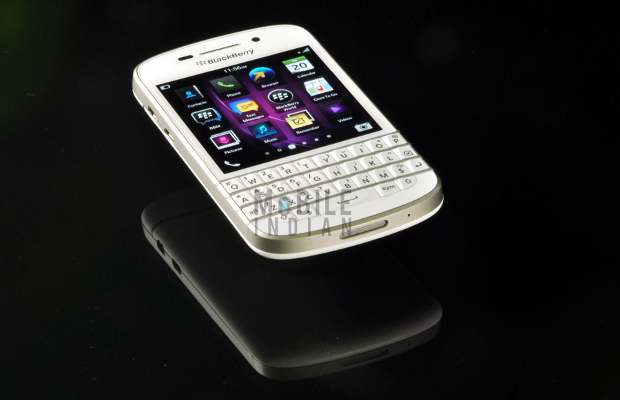
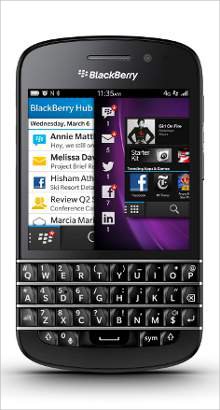
BlackBerry Q10 review: Qwerty is back


BlackBerry Q10
PROS
  • Performance
  • Display quality
  • Features
  • Battery
CONS
  • Odd aspect ratio
  • Too few applications
Canadian smartphone maker BlackBerry has tried to bring back the glory of Qwerty keypads with BlackBerry Q10. The smartphone is based on BlackBerry's latest BlackBerry 10 operating system, which comes with a lot of features.
BlackBerry Q10
The BlackBerry Q10 has a premium appeal at a premium price point of Rs 44,990. But is it really worth the price? Let's find out.
Look and feel
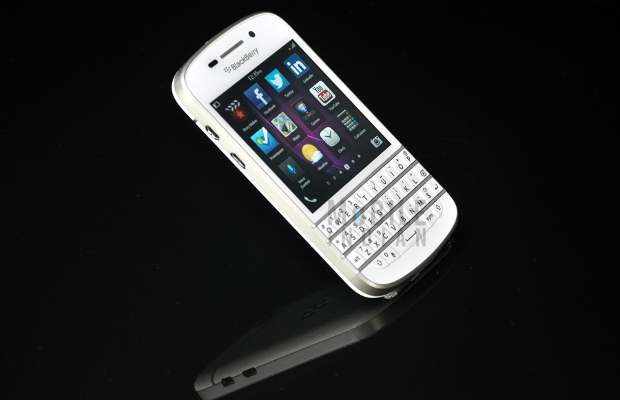
The BlackBerry Q10, as the company describes, is a premium product and has been priced likewise. The device is very well designed.
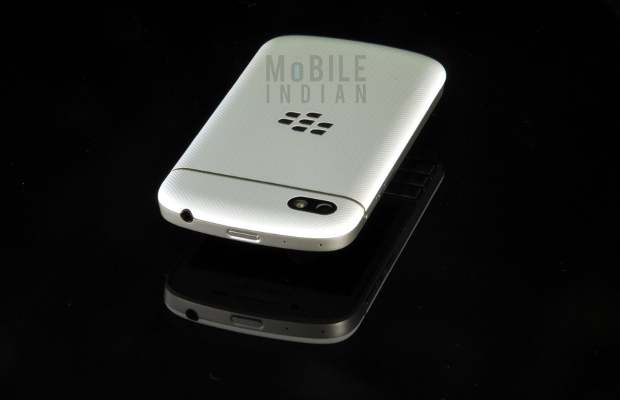
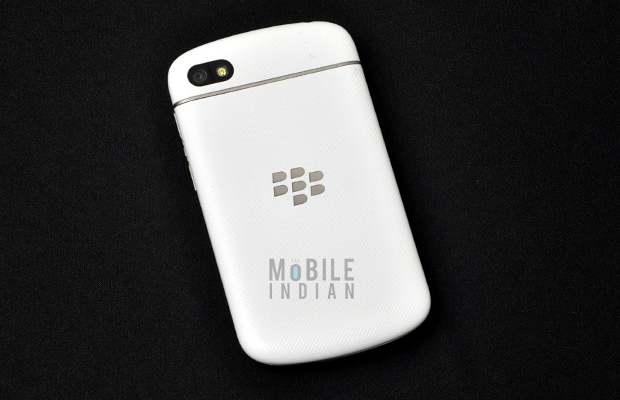
The Q10 has a machined metal chassis carved out of a single piece of metal for durability; while special care has been taken in the selection of metal to make the device light as well. We received the white variant that misses out on the signature glass weave back panel, but the high-grade polycarbonate felt quite sturdy.
BlackBerry Q10
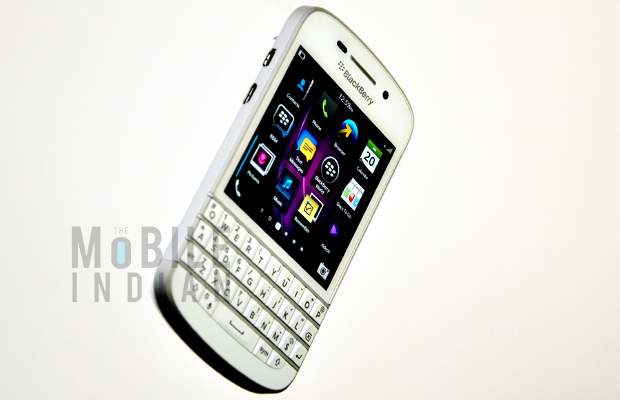
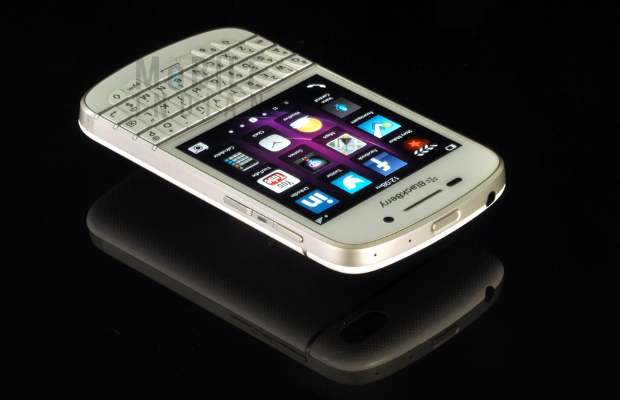
On the right side, the BlackBerry Q10 has volume controllers while on the top it has the power button - both metallic. The loudspeaker has been placed right at the bottom of the device while the 3.5 mm audio connector has been placed on top for easier access. Overall, the device is lightweight while its textured back has a good grip.
The keyboard, which is the highlight of BlackBerry Q10, has an excellent tactile feel. The keys are also big enough for easier typing. The key rows are straight with a silver strip above each row that gives the phone a classy look.
Display
The BlackBerry Q10 comes with a 3.1 inch Super Amoled 720 x 720 pixel display with a density of 328 pixels per inch. The display is good for most tasks including watching HD videos. But even though everything is good, the odd aspect ratio might not be liked much. While playing videos, the display simply wastes a lot of real estate and videos that are already tiny look even tinier. The moment a video is played the top and bottom of the screen show these big black bands that happen due to wide screen videos being resized on a square screen.
BlackBerry Q10
The touchscreen on the other hand is quite responsive and actions are translated on the device without any effort or lag. The Q10 offers very high pixel density, which makes visuals lively and there is no pixilation anywhere, anytime. Sunlight legibility is also good due to higher contrast and brightness, plus the ambient light sensor works flawlessly offering great visuals all the time.
Hardware
The BlackBerry Q10 comes packed with a dual core 1.4 GHz OMAP 4470 processor from Texas Instruments based on ARM cortex architecture and 2 GB of RAM. The hardware configuration, along with with the new age operating system, offers fluid operation and reduced application load time. The lack of a home screen and the adoption of swipe gestures for the user interface take some time to get used to but actually offer better performance and utility than having buttons on screen.
BlackBerry Q10
The BlackBerry Q10 comes with 16 GB on-board storage and an expandable slot for up to 64 GB micro SD. The Q10 also features an HDMI input for connecting the device to a large HDTV directly.
BlackBerry Q10
For wire-free connectivity the Q10 comes with Bluetooth 4.0 and NFC, which though it has been slow in terms of adoption, is a good feature to have for future.
Operating system and performance
The relatively new BlackBerry 10.1 OS makes the BlackBerry Q10 look good and perform well. Those who are worried about the big difference in the new OS 10 will hardly take a day to get used to the BlackBerry 10 OS.
In the BlackBerry Q10, the company has added a new Type and Go function. If users want to send an email to someone in the phonebook they just need to type 'email,' followed by the Contact's name and the device gives the option instantly.
BlackBerry Q10
A similar shortcut can be tried for the BlackBerry Messenger, Facebook or Twitter apps. Just type the app's name and contact name to send the message to the user. You need to press through the different navigation levels for sending an email. Another visible change is that the Active Frames appear square instead of rectangular because of the smaller display.
BlackBerry Q10
The swipe functionality for the operating system and user interface works great but the space between the touchscreen and physical keypad has been kept too less. While using the device we ended up touching and pressing the upper-most row multiple times while all we needed was a clean upwards swipe.
BlackBerry Q10
Another highlight of the phone is the predictive input system, which was adopted for the BlackBerry Z10 and has been disabled by default for the Q10. Although having a physical keypad makes no sense having predictive input would save more time and as far as utility goes the touchscreen is anyway close enough for users to select words from the suggestions given on the screen.
BlackBerry Q10
The much talked about application store doesn't feature many utility based applications for the Q10 specifically and the same old applications that were available for OS 7 based devices still exist as the top most preference.
Overall, the BlackBerry Q10 is a good device provided that applications are made available to unlock its full potential. The Q10 utilises optimisations done on the OS for better and more fluid performance. So it does not matter if it's a dual core processor it justifies smooth and effective device usage as well.
Camera and multimedia
BlackBerry has used an 8 megapixel camera with auto focus and LED flash at the back. The camera is quite responsive and is the same unit as the one used on the BlackBerry Z10.
BlackBerry Q10
There is a 2 megapixel front facing camera for video chat and video calls via BBM but the camera interface does allow users to capture self-portraits with that or use it as per their need. The BlackBerry Q10 can record 1080p videos using the rear camera and 720p videos using the front camera. The image quality is good but it lacks sharpness, plus the square screen is really not meant for viewing pictures and video, which adds to the pain.
BlackBerry Q10
Yet, the camera justifies its presence with decent all round picture in good light conditions, while low light images are supplemented with LED flash. Video playback as we mentioned earlier is a nuisance and is better avoided on the BlackBerry Q10. Music playback on the other hand is good and the loudspeaker is one of the loudest in smartphones today. FM radio is still missing but hopefully upcoming BlackBerry models like the Q5 will come with it, as rumors have suggested.
Battery life and conclusion
One of the best features of the BlackBerry Q10 is its battery management system that ensures that the device does not run out of juice in the middle of the day. For average users the device would last anywhere from 1.5 to 2 days and for heavy users it would still manage to give about 1-1.5 days worth of backup.
BlackBerry Q10
But ultimately the BlackBerry Q10 is something BlackBerry fans were really waiting for though the price might turn off some of its fans. The device, without any doubt, has a premium appeal to it and offers NFC and HDMI along with core BlackBerry functionalities.
So, leaving price aside BlackBerry Q10 is a premium device with premium appeal and pricing as well, but to justify that BlackBerry Q10 offers a great Qwerty keypad, good but strange square-ish display, amazing battery life and features to keep you going for the next couple of years. The only snag is that it has very few applications.
BlackBerry Q10 review: Qwerty is back Specifications
Network
Operating SystemBlackBerry 10
Dimensions119.6 x 66.8 x 10.4 mm, Weight 139 g
Display3.1 inch
Input MethodQwerty
Processor1.4 GHz dual core
Memory2 GB RAM, 16 GB, 32 GB expandable
ConnectivityWiFi, Bluetooth, NFC, HDMI
MultimediaMulti format audio video playback
Camera8 megapixel auto focus with flash, 2 megapixel front
GPSYes, with Agps
Additional features
Battery2100 mAh
Warranty1 year
PriceRs 44, 990

SK Telecom launches the world's first LTE-Advanced network, and the Galaxy S4 LTE-A

SK Telecom launches the world's first LTEAdvanced network, and the Galaxy S4 LTEA
Just days after an LTE-Advanced variant of Samsung's Galaxy S 4 leaked, Korean carrier SK Telecom has officially announced it's launching the world's first publicly available LTE-Advanced wireless network. The Galaxy S4 LTE-A is also official (in red or blue) as the first device able to take advantage of the new technology for even faster data transmission speeds. According to the press release, SK Telecom plans to have as many as seven LTE-A devices available by the end of the year, all capable of up to 150Mbps. While SK Telecom is using Carrier Aggregation and Coordinated Multi Point technology to improve speeds right now, it will add Enhanced Inter-Cell Interference Coordination in 2014 to go even faster. After that, it suggest carrier aggregation will improve to support higher speeds and faster uploads in subsequent years.
To take advantage of the higher speeds, SK Telecom's Btv IPTV service will begin offering 1080p video streaming in early July. That will be accompanied by enhanced multiview baseball broadcasts, more free videos, an HD video shopping service with six channels on one screen in August and the addition of FLAC audio files via its music package. Right now, the company has Seoul covered in LTE-A, and plans to eventually offer it in 84 cities, all at the same price as existing LTE service. Check after the break for the press release with all the details, plus video of a speed test.
Update: We've just come across another juicy tidbit that makes the Galaxy S4 LTE-A all the more worthwhile -- it'll ship with a Snapdragon 800 SoC that contains a 2.3GHz quad-core CPU, plus 32GB of built-in storage and a 2,600mAh battery. It goes without saying that this phone will be speedy on all angles. As spotted bySlashGear, the new GS4 variant will also see the debut of a new Samsung software feature: ImageON. Explained as a Google Googles-esque app, it'll automatically analyse photos and offer up related videos and "extend access to relevant content on the internet."

Jun Katsunuma on the inspiration for Xperia Z Ultra's design

Sony's Jun Katsunuma on the inspiration for Xperia Z Ultra's design

Image
After the Xperia Z Ultra's launch event in both London and Shanghai, we had a brief chance to talk to Sony's Product Design Director, Jun Katsunuma, who was present in the latter city. Jun's been responsible for Sony's mobile devices since the Xperia S days, so the transition to the Xperia Z's double-glass design was also under his watch. That said, the newer Xperia Z Ultra isn't simply just an enlarged version of its smaller sibling, as we found out straight from the horse's mouth.
"The frame [on the Xperia Z] is made of plastic, then we picked a PMMA (a transparent thermoplastic) for the plate," Jun reminded us while holding both devices. "But this time we use aluminum in the side plates, which means it's totally different, then we could realize this super thinness [on the Xperia Z Ultra]."
On a similar note, Jun pointed out that the Xperia Tablet Z is more like the Xperia Z, except for the former's reinforced fiber back. Even then, the tablet is thicker than the Xperia Z Ultra by 0.4mm, courtesy of the latter's aluminum contruction.
Here's another subtle difference that Jun shared with us. While the 6.5mm-thick Xperia Z Ultra has the same black, white and purple options as the thicker Xperia Z, the designer intentionally chose not to give the new phone the same glittery purple paint. The reason being a solid purple apparently just looks better under the larger piece of glass. And it's not Gorilla Glass here, by the way, but Jun and his colleagues assured us that the glass on the new phone is just as strong -- especially since the super responsive touchscreen (our guess is that this is Atmel's solution) supports pen and pencil input.
Sony's Jun Katsunuma on the inspiration for Xperia Z Ultra's design
Without naming the elephant in the room, Sony Mobile's Marketing Programme Manager Benoit Obadia acknowledged that there's indeed a stronger request for bigger displays on phones these days. But as to why his team specifically chose a 6.4-inch screen size, Jun said it was simply a matter of finding the largest panel that he could fit into the width plus a similar thickness of a passport -- something that travelers are used to carrying around all the time, especially in their coat pocket. Similarly, seasoned travelers are also likely to be carrying a pen, which can be used for scribbling on the Xperia Z Ultra. That way they won't have to carry a dedicated stylus.
"The point of this Xperia Z Ultra is how we could let the users bring this one into their travel and daily life," said Jun. "That's why we chose aluminium to realize our product's proposition."
Lastly, we pointed out the potential fatigue over the all-too-familiar design ID of the latest Xperia-branded devices, but Jun and Obadia implied that at the moment they're not too concerned due to the positive response. Still, the designer realizes there needs to be a balance, and his team solves this problem by implementing some subtle but practical differentiation.
"At Sony, we need to bring some of that message with consistency," said Jun. "The Xperia Z, the Xperia Tablet Z and the Xperia Z Ultra are very strong in consistency, but of course, they have different propositions. So that's how we decide to use some different materials, different pigmentation and sometimes construction. Based on this product and based on our one design language, we really do some differentiation but with high consistency.
"The use case of the smartphone is changing, so we need to consider how we can express the differentiation in any use case in any product. So we create our designs based on this high-level concept."

Nokia to stream its New York Lumia event.

For anyone that won't be attending Nokia's incoming New York event, you won't have to sit in silence until the news breaks, because the entire event will be streamed from Nokia's own Conversations site. There's nothing going on at the link yet, but you can at least bookmark it for now and we'll be there in person to report on all the important announcements, presumably including a photo-lovingzoom-reinventing new Windows Phone

Tuesday, June 25, 2013

[GUIDE] Root for Verizon Galaxy S4


Description: This is a simple guide that will allow you to easily root your Verizon Galaxy S4 device without having to wipe your device or flash a full prerooted factory image. This method works using a leaked prerelease kernel (provided by user sextape) and root method (provided by user djrbliss). Only change is I have modified the Motochopper root method to use the latest SuperSU instead.

Video Demo of the Full Process (Courtesy of DroidModd3rX)

Quote:

Step 1 - Preparation

Quote:
  1. Download and Install Samsung Official USB Drivers - Link
  2. Download and extract ODIN v3.07 - Link
  3. Download the VRUAMD2 Prerelease Kernel - Link
  4. Download the VRUAMDK Stock Kernel - Link
  5. Download and extract the Motochopper Root Exploit Tool - Link

Step 2 - Flashing VRUAMD2 Prerelease Kernel to remove Root block

Quote:
  • Boot phone into ODIN mode (See here for how-to)
  • Flash the VRUAMD2 Prerelease Kernel using ODIN v3.07 ***in PDA section only*** (See here for guide on flashing)
  • Boot back to Android and verifying everything is still working and kernel has flashed successfully

Step 3 - Rooting Your Device

Quote:
  • Go into Settings > More > About phone > tap "Build number" about 7 times until it unlocks Developer options
  • Verify in Developer options setting on your device that you have "USB debugging" checked
  • Verify in Developer options setting on your device that you have "Verify apps via USB" unchecked
  • Verify in Security setting on your device that you have "Unknown sources" checked
  • Verify in Security setting on your device that you have "Verify apps" unchecked
  • Connect your phone to your computer and open "Run.bat" file from the location you have extracted motochopper to
  • You will see a message on the phone asking you to accept the new computer connection (select to always allow and select OK)
  • After motochopper runs and your phone reboots on its own, check if SuperSU has any update in the Play Store
  • Open SuperSU app and let the binary update itself to the latest ***VERY IMPORTANT OR YOU WILL LOSE ROOT ON STEP 4***
  • Once complete, just open a root application and verify that is able to access root properly

Step 4 - Restoring VRUAMDK Stock Kernel

Quote:
  • Boot phone into ODIN mode (See here for how-to)
  • Flash the VRUAMDK Stock Kernel using ODIN v3.07 ***in PDA section only*** (See here for guide on flashing)
  • Boot back to Android and verifying everything is still working and kernel has flashed successfully
  • After your phone boots back to Android, you should now be fully rooted and on the fully original stock firmware as the device came

Step 5 - Restoring Custom Recovery (Optional)

Quote:
  • Make sure you are rooted first using the above 4 steps first
  • For TWRP Recovery follow the steps in this thread (or download from Goomanager): Link Here
  • For CWM-based Recovery follow the steps in this thread: Link Here
  • For OUDHS Gesture Touch CWM-based Recovery follow the steps in this thread: Link Here

Credits

Credit goes to sextape for providing the VRUAMD2 Prerelease Kernel (Original Source)
Credit goes to sextape for providing the VRUAMDK Stock Firmware and Kernel (Original Source)
Credit goes to djrbliss for creating Motochopper Root Exploit Tool (Original Post)
Credit goes to cnlson for providing ftp filehosting (via PM)
Credit goes to ChainsDD for creating Superuser (Original Source)

Please note: Credit for this method goes entirely to the users who have created these tools and provided the files. I am only bringing together all these files and creating a simple guide for everyone to follow.

Monday, June 24, 2013

Android Reverse Tethering for windows users.

Android Reverse Tethering for windows users.

Tethering is the ability to surf on your pc using the 3g of your phone
Reverse tethering is the opposite : surf on your phone using the ADSL of your PC. No Wifi or 3G connection required.

This work only for rooted users !!!For non rooted users, you can try my other solution, but require more manipulations and is limited to surf : http://www.codeproject.com/KB/androi...orwarding.aspx

Installation :
Unpack the zip file. This zip files contains the windows part, ADB and the android APK.

Before starting the tool : 
  • You must install drivers for your device. Generic driver provided by google is on the usb_driver.zip
    You can also check the Universal Naked Driver
  • Ensure you have debugging enabled on your phone :
    Settings > Applications > Development > USB Debugging > Turn On
  • Ensure you have root access AND SuperUser application installed.
    Change the superuser settings (Menu -> Preferences -> Notifications part) :
    Uncheck "Notifications" label to display "Do not show notification when an app is granted Su Permissions"


AndroidTool
The AndroidTool.exe is the windows part

The low level communication tool (ADB) is included in the zip file.
AndroidTool will try to find ADB in c:\android-sdk-windows\platform-tools\adb.exe
If not found he will use the provided one.

The first time you use the program :
  • If you want to use another version of ADB, clik "config" and in the first tab enter the path to the ADB
  • Select the DNS server to use in the right list. On complex system, some dns can be detected.

Start reverse tetheringJust click “Connect”.
If it's the first time you use the program, This will install the latest android package and the dependencies (busybox and redsocks).
The SuperUser process may ask you to allow “Usb tunnel”


If the android process crash after receiving superuser rights, close the windows program and start again.

The android interface (first tab) will show connections forwarded to windows.
Others tabs are just for debugging (give information about system route tables and connections). Not yet finished.

Start your browser 
Google chrome will complain that no connection is available. Don’t care. That work.
Firefox , opera and dolphin don’t have problem with that !!!

The current version of the application can’t forward low level ICMP packet (PING).
From Android Os point of vue, there is no internet connection.

Google Market/Play :

For android 4.x ONLY
Since reverse tethering version 3.4, it's now possible to download/update application.
This step is optional !
Required only if you want to download from market.
I recommend you to perform a nandroid backup before installing the hack.
Don't worry, I didn't brick my phone and tablet during the development.
The Xposed framework author and me are not responsible for anything you do with your phone/tablet/rice cooker.
  • On the windows program, go to tools tab and click "install hack"
  • Launch the Xposed Installer (you just installed) on your android and click on "Install/Update"
  • Go to the module tab and check the HackConnectivityService (see screenshot below)
  • Reboot the phone
  • Done!
    This work for market but also for some other programs (some games,skype,hangouts...)


For older android 2.x or 3.x version :
The application want to have an active 3G or Wifi network interface.
Some market applications are tagged "Wifi" only.
To get around this problem, you can activate the 3G BEFORE starting reverse tethering,all the data will goes to the usb.
Tips : You can connect to some wifi hotspot not protected by a key.
It's only when you want to surf that the hotspot ask you a user/password.
But, at this point, we have an 'active' connection. Market download should work after starting reverse tethering.

Not fully working application but work if you install the HackConnectivityService on android 4.x:
  • Market download
  • Spotify
  • Skype. (not checked yet)
  • If someone know another one, post a reply !

Troubleshooting

If your device is not listed in the "select a device" combobox :
  • Ensure Usb debugging is enabled (Settings > Applications > Development > USB Debugging > Turn On). Deactivating and reactivating the Debug mode may help
  • The ADB subsystem is sometimes not working properly. Click the "Kill ADB" button (on Tools)
  • Your device is perhaps not installed properly. See your device manufacturer. You can download a generic driver from google here :http://developer.android.com/sdk/win-usb.html.
  • Windows can detect your device as a "Media Transfer Protocol" (MTP) or "Picture Transfer Protocol" (PTP). When you connect the usb cable, you have a notification. Click the notification to change this parameter. If one don't work, take the another one...
Click refresh or restart the tool to detect your device.
If the connection shutdown often, try another usb cable

Android 4.3 Troubleshooting
Google added some security stuff on this version.
Important : You have to connect your phone/tablet to wifi at least once after boot before using reverse tethering !!!

Proxy :
There is 2 problems with proxies :

Android 3G proxy. Even if 3g is desactivated, your provider (APN) proxy may still used by applications.
The windows tool is not able to communicate with your provider proxy.
Note that not all providers include a proxy. You must remove it manually.
The tool will give you informations on how to do it when detected.

Corporte proxy. The windows application is not able to traverse proxies.
The good news is that you can use some applications like FreeCap , sockscap and proxifier.
You must start the androidTool from one of these launchers, giving proxy adress and port.
Thanks "edgd1er" for the information.

History :

Version 3.14
  • Small bug fixes, added debug code in case of crash
  • Added xposed debug code for connectivity hack

Version 3.11
  • Nothing in the program
  • The zip include the latest Xposed framework.
    It's NOT mandatory to update to the latest framework.
    Usefulll only for android 4.3.
    Click the "install hack" button on tool tab to update the framework.
    After install, you MUST run the XPosed installer, tap the "framework" line , tap the "Install / update" button THEN reboot.

Follow new updates on twitter : @reverseTether
Do you like this program ? Want to make a donation ? Send any amount to my paypal account (click the donate button)


Older versions were removed (372739 downloads)
ATTACHED FILES
File Type: zipReverseTethering_3.14.zip - [Click for QR Code] (3.98 MB, 5328 views)

Sunday, June 23, 2013

Panasonic P51 review: A BIT OF disappointment


Panasonic P51


PROS
  • Build quality
  • Camera
  • Battery life
CONS
  • Price
  • Low internal memory
If a handset player doesn't have a phone for the Indian market, it is not on the right track. This is not a personal statement. Rather, it is a reflection of what is happening in the country. Except for a few players that you can count on your fingers, almost all the major players from across the globe have launched their phones in India.
Panasonic P51
The latest to join the party is Panasonic, with the Panasonic P51, and that's not all, it has even tied up with the Jaina Group (parent company of Karbonn mobiles) for leveraging their distribution network for making P51 available across India.
Panasonic P51
We have been reviewing Panasonic P 51 for the last 14 days and here is our take on the company's first smartphone for Indian consumers.
Inside the box
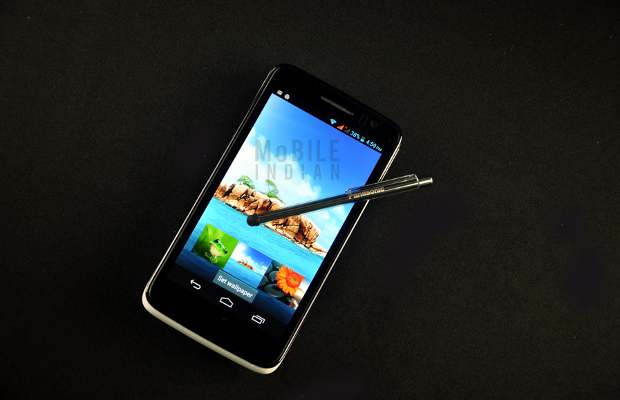
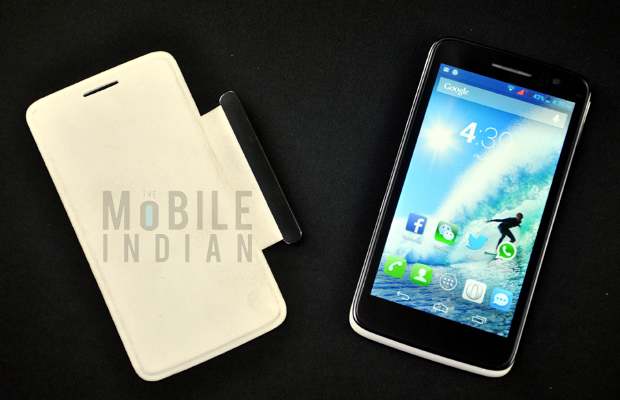
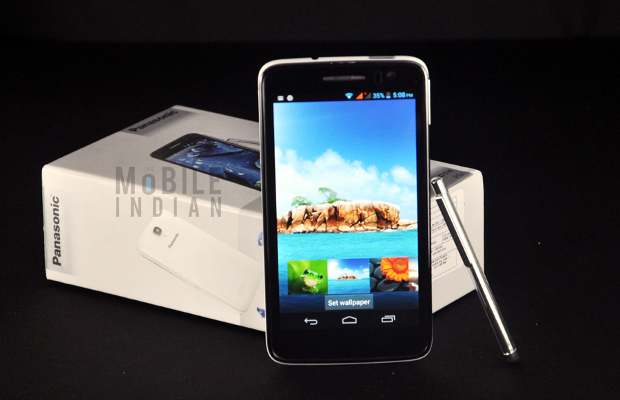
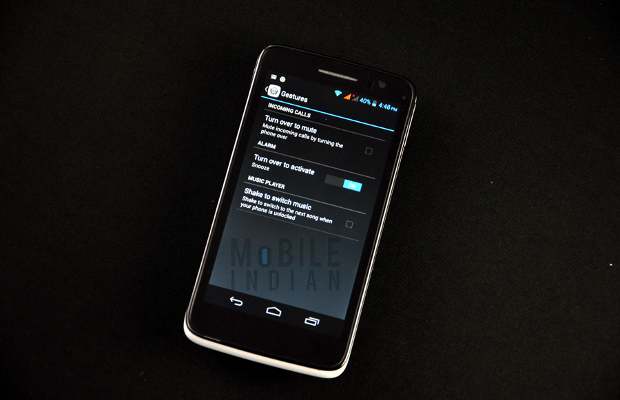
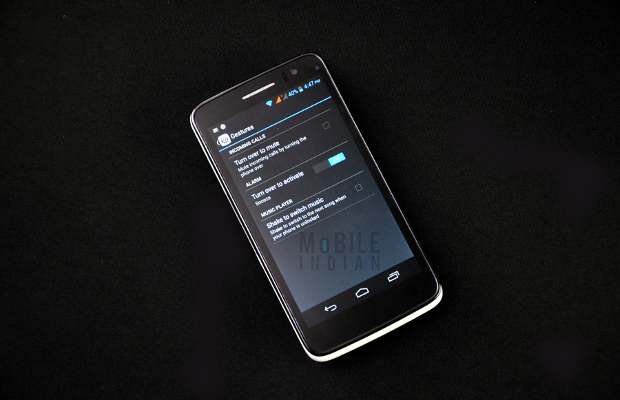
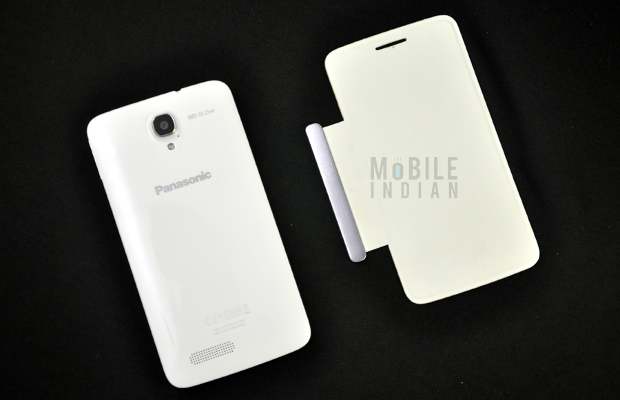
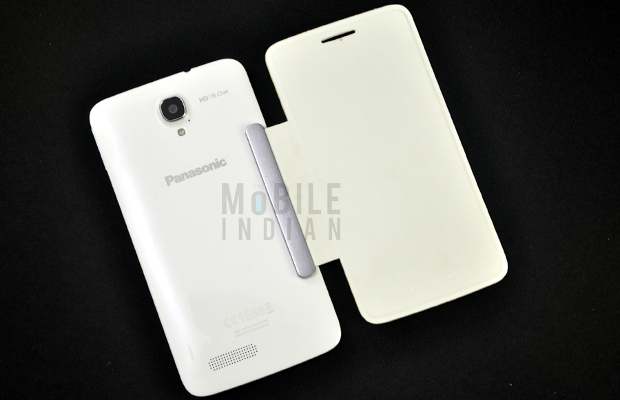
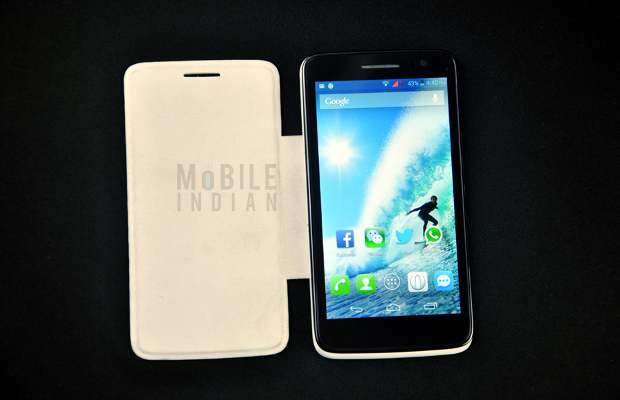
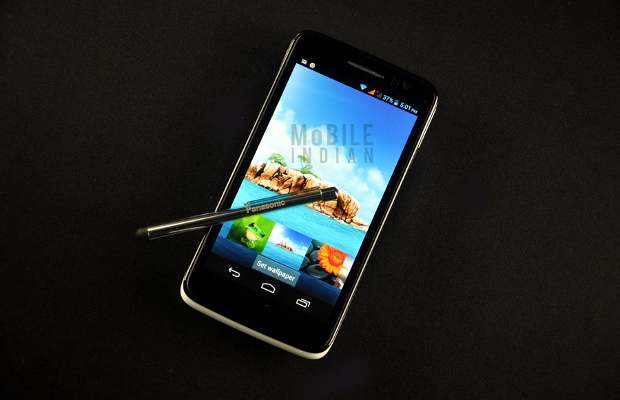
In the box of Panasonic P 51 you will found a magnetic flip cover, stylus, charger and data cable. We didn't find use for the stylus as the device was quite responsive to touch.
Panasonic P51
Also, instead of a magnetic flip cover a full smart cover would have been quite handy.
Look and feel
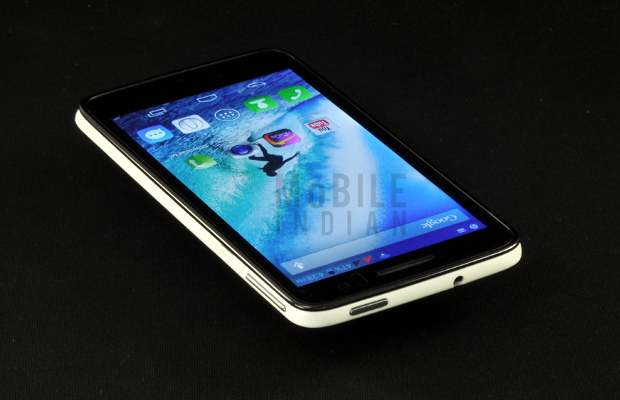
If you don't take a close look at Panasonic P51 or hold it in your hand, you might mistake it for LG Nexus 4 for they look remarkably similar.
Panasonic P51
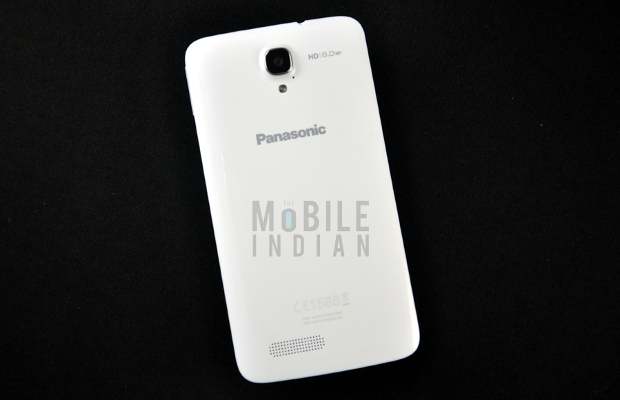
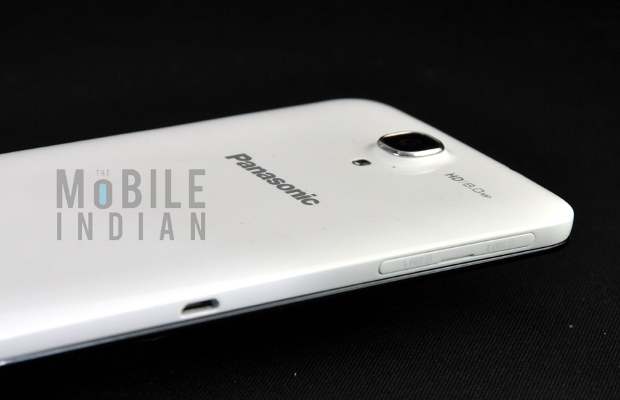
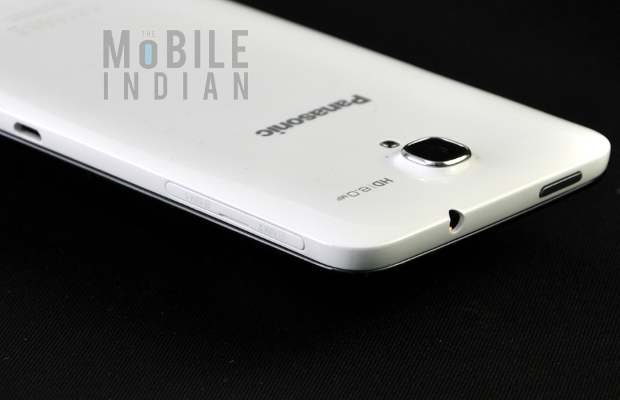
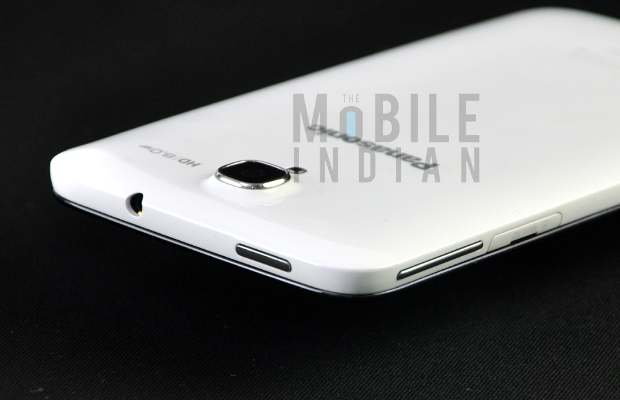
But, you will feel the difference after holding it in your hand. The back panel of the smartphone is slightly protruding, which gives Panasonic P51 a unique design. Its full glass front panel is surrounded by a raised grey coloured graphite strip (in the white model,) which protects the screen from scratches when it is face down.
Panasonic P51
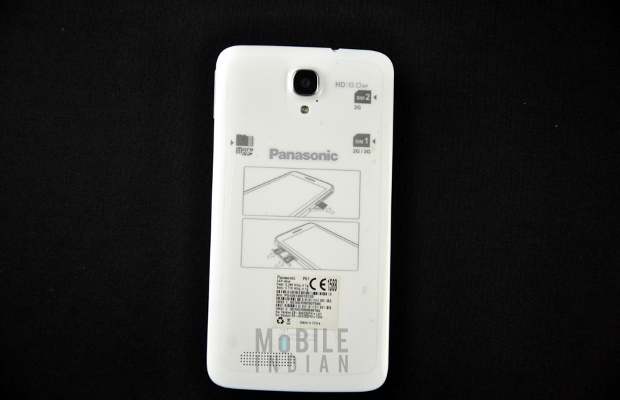
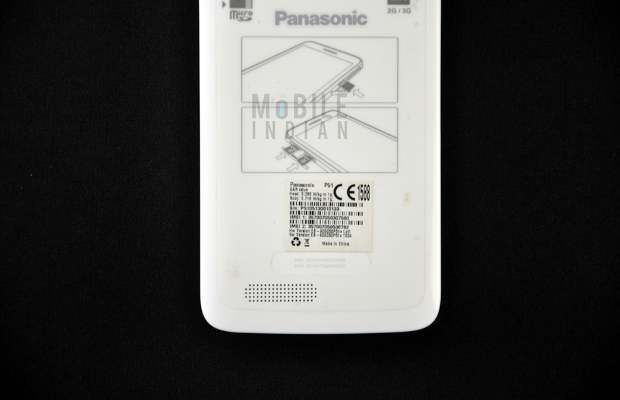
The Panasonic P51 has a unibody design, thus one cannot replace the battery. We received the white coloured unit for review. It has a glossy plastic body but isn't a fingerprint magnet. It doesn't feel cheap but I would prefer the black coloured device with a rubberised back panel.
Panasonic P51
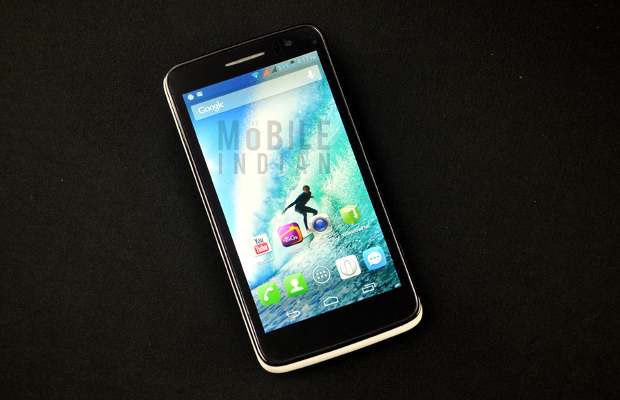
The 5 inch screen of the Panasonic P51 is made of Asahi Dragon Trail glass. It is claimed to be better than Gorilla glass in terms of scratch resistance.
Panasonic P51
The front panel of the smartphone doesn't have any capacitive buttons-return, home or menu; rather, they are embedded in the display itself and thus can be accessed when you turn on the device. The top of the front panel has a steel mesh grill and front camera, and a couple of sensors.
Panasonic P51
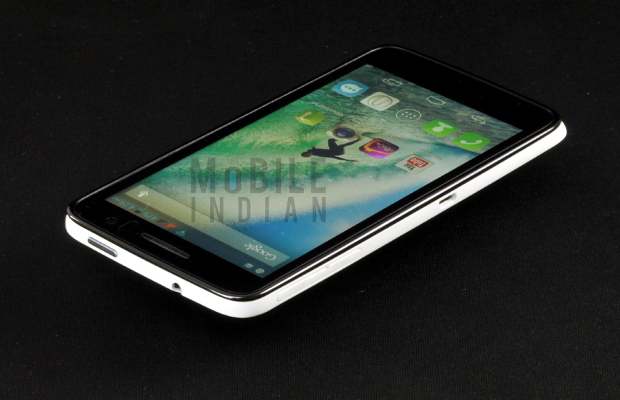
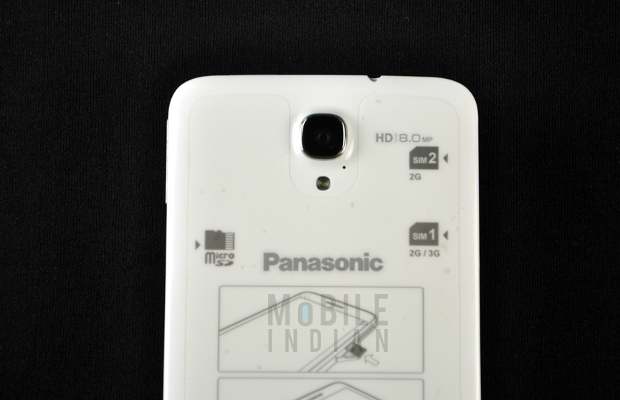
In the top panel you will find a power button along with a 3.5 mm jack. On the right side of the phone there is a volume rocker and right below it a micro SD card slot, which is covered by a plastic door. The left panel of the smartphone houses two micro SIM card slots covered with a single plastic door, and a micro USB port.
Panasonic P51
The overall body of P51 looks solid. The design is attractive but the button and port placement could have been better. The power button is not easily accessible; the volume rocker and micro USB ports are awkwardly placed. After using the phone for some time you will get used to the button and port placements, but you will wonder why Panasonic made such silly flaws in the design.
Panasonic P51
Nonetheless, the above mentioned flaws cannot take away the goodness of the overall design of the smartphone and the good quality plastic used in making it, as compared to Samsung's Galaxy smartphones.
Display
Panasonic P51 has a 5 inch IPS display with 1280 × 720 pixel resolution made of Dragon Trail glass.
Panasonic P51
The pixel density of the display is 294 ppi and as compared to other devices with 1280 × 720 pixel resolution, it has better colour reproduction and outdoor visibility.
Panasonic P51
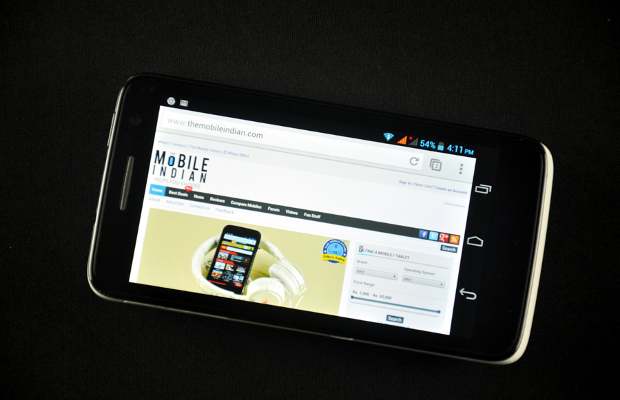
Viewing pictures or videos on Panasonic P51 is a pleasure. Surfing the web or checking out mails is not stressful on the eyes either. I was not comfortable using the magnetic flip cover so during the review I used the smartphone without any protective covering. Despite my rough usage there were no scratch marks on the display.
Camera
Panasonic P51 has an auto focus 8 megapixel rear facing camera and a 1.3 megapixel front facing camera.
Panasonic P51
Rear camera
Snaps taken with the rear camera gave good results in well-lit conditions and in low light they were of average quality. Especially portraits and close ups come out really well. Also, auto focus does a good job.
Panasonic P51
Panasonic P51
Panasonic has not overlaid a unique user interface over the camera app and it comes in standard modes like panorama, smile detect and HDR, but not multi-angle, which is a sweeping panorama made of multiple angles of a picture stitched into a single snap.
Panasonic P51
Panasonic P51
The rear camera of P51 can also record full HD (1080p) videos. To avoid shakes while recording it has incorporated software based image stabilisation. Video quality along with audio is quite good in well-lit conditions though in low light it is found wanting.
Panasonic P51
Panasonic P51
Front camera
The 1.3 megapixel camera is okay for self-portraits as well as for video chatting.
Panasonic P51
Hardware and performance
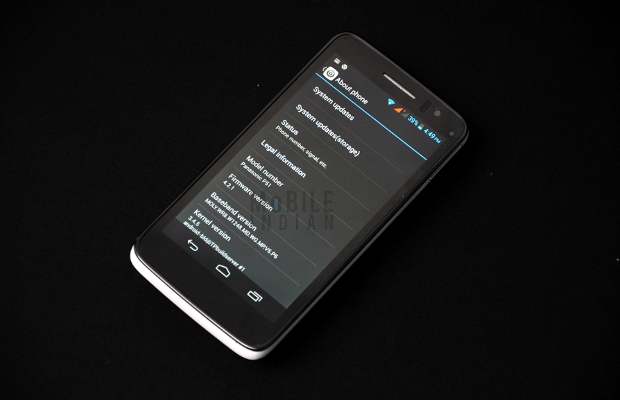
Panasonic P51 runs on Android 4.2 Jelly Bean and is powered by a 1.2 GHz Mediatek MT6589 quad core chip, which is used in Micromax Canvas HD and many other low cost quad core phones. Panasonic though has not tinkered with the stock Android user interface, which is quite popular.
Panasonic P51
Like most mid-range smartphones from Indian players, P51 too has 1 GB of RAM and 4 GB internal storage. Internal memory can be expanded up to 32 GB using a micro SD card.
Panasonic P51
I would have loved it if the device had had additional internal memory or a bundled micro SD card because the current 2 GB seems too low for a Rs 22,000+ phone. One may feel frustrated because lack of space may prompt messages asking to free up some space to continue downloading.
Panasonic P51
If we look at other smartphones priced at around Rs 24,000 like Samsung Galaxy SIII, we find internal memory and processor speed to be inferior in the P51.
Panasonic P51
Surfing, using cellular data connectivity and syncing the smartphone are very smooth and fast. If you love playing Fruit Ninja, Subway Surfer or Temple Run you will be satisfied with the performance, but when you use the device for playing high end graphic intensive games like Real Racing 3 or Mortal Combat you will encounter some lag.
Battery life
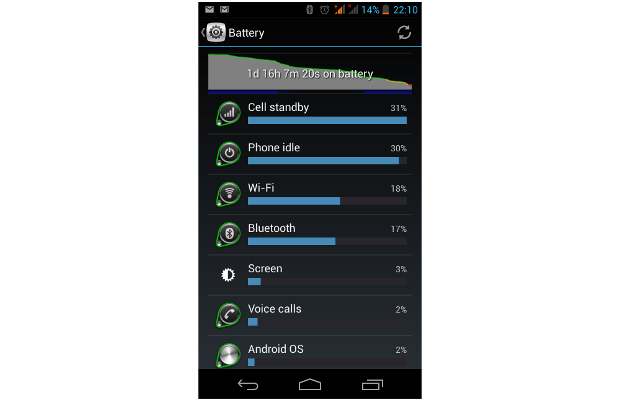
The Panasonic P51 is powered by a huge 2500 mAh battery. To our surprise, we got one and a half days ( 1day, 16 hours) of power backup on a single recharge.
Panasonic P51
In the said period I used the phone keeping 3GWiFi and Bluetooth on. Apart from that, mail and contact syncs were also active. I used the phone to browse the web for around 45 minutes, played games for about 30 minutes, made calls for around 1 hour and listened to music for about 40 minutes.
Panasonic P51
Panasonic P51
In short I can say if you're looking for an Android smartphone with good battery backup Panasonic P51 is a device you could check out.
Conclusion
Is Panasonic P51 worth buying for Rs 22,500? In terms of design, performance, camera and battery it is worth buying, but memory and processor speed are not up to the mark as compared to its competitors (Samsung Galaxy S III, LG Optimus Vu). In fact, handsets with the same specifications (Micromax Canvas HD, Gionee GPad and Xolo Q1000) are priced far lower than P51.
Panasonic P51
Panasonic P51
Panasonic P51
Also, if in the coming days there is a price reduction of, say, Rs 4,000 then this phone is a good buy.
Panasonic P51 review
Network
Operating SystemAndroid 4.2
Dimensions144 x 75 x 8.5 mm, Weight: 135 grams
Display5.0 inches,1280 x 720 pixel
Input MethodTouchscreen
Processor1.2 GHz quad core processor
Memory4 GB, 1 GB RAM
ConnectivityDual SIM, WiFi, Bluetooth
MultimediaSupports all major audio file types
Camera8 megapixel rear and 1.2 megapixel front camera
GPS
Additional features
Battery2500 mAh
Warranty1 year
PriceRs 22,500